Monday, October 26, 2020

Reverse Engineering Progress Part 2

 Hey There, 

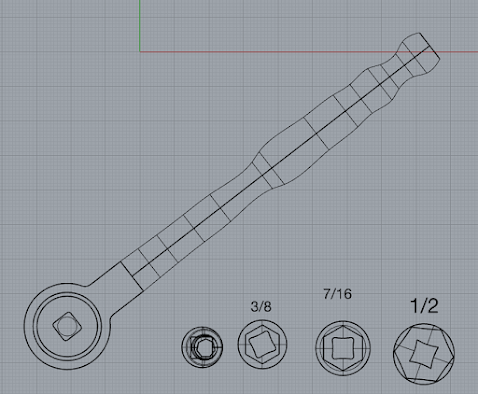
10:39pm - Another grueling week of countless hours of work on this thing. Progress is being made, however I recognize there is a lot of work still to do. My biggest problem has been working in perspective, I just can't seem to get the hang of it and when I touch the mouse I seem to completely lose my place. It has been a hard week. Also still on a budget so, no chips this week...tried spits... I don't think there is anything more disgusting than spits. HA HA 

I haven't started the screws yet, nor have I tried the bits. I just keep chipping away.... I also have lots of work to do on the socket wrench. Hours and hours to go. 

I've also started working in layers, so many pieces and I was running out of space. 


Still working through the bevelling of the edges, on the socket pieces, I've run into some trouble with splitting and Rhino is being tricky. 


I am happy with the screwdriver piece and I still have lots of details to incorporate. 

I have most of my pieces built with the exception of the smaller ones. It requires revolve and I have figured it out, I just need more time to work on them. This is a lot. 


The first one went well, but each one requires multiple measurements and like I said above I seem to have hit a snag with splitting. 


Keeping track of all the little pieces is crucial. 


Here is to another week of getting through and working through the process! Hope you're having fun too. 


Cheers, 

Jess 

Monday, October 19, 2020

Reverse Engineer Socket Set Progress 1

 9:22pm, J.Broz blog 

Well this was an ambitious project... Not only am I frustrated, the tiny little details in this are very annoying and do not appeal to my nature at all. I am finding this fussy, time consuming and really, really difficult. I managed okay this week with no meltdowns and I am struggling with many elements of the tools. The beveled edges, the rounded edges, linking the handle to the wrench, and figuring out how to get the shapes to come together. Le sigh. LOL 

I've been told that with patience and perseverance, you can piss a hole through a rock. So with a whole lot of patience, and a load of perseverance here is my progress for the week. So far, rudimentary at best, so I have a lot of work to do and I need to start over again. This whole mess just feels like a lot of practice, but with practice I get better. Also no chips this week as I'm on a budget, but I did manage a pot of chicken soup this weekend. 


This is my mess of extra little bits. 


Hope you're finding your way through too! 

Cheers

Monday, October 12, 2020

Reverse Engineer an Object

 Monday October 12, Jessica's Blog... 

My apartment is full of many things, and when thinking about them in the 3D context, and having to recreate something I considered what would be the most fun to recreate. What items do I use most in my house, or have been neglected? How I see them now as not just a functional object, but rather an item that has been carefully designed in a program like this one. I am looking to challenge myself and the selected items I would be excited to do. I also am confident many chips will be consumed. Any recommendations? 

My first thought. Throw back to the early 90's for me before the discman came out and forever changed the way we listened to music, until well you know... you're probably plugged in right now. I think something like this would be challenging. Interesting shapes, and protrusions. The belt clip on the back and the battery door, as well as the cassette door... Lots of elements to work with here. I'm curious about the interior too, and if I would be able to execute in the time allotted?  


My socket and screw driver set, one of the most used tools in my house, and I am very diligent on ensuring that all of the pieces are back in place before I put it away. Lots of different shapes, textures, and text to work with here. I think the case on its own will be interesting. I also like the detail of the paint on the handle. 


Lastly, a box of crayons. When my nephews come to visit the crayons are out, hence some badly damaged and missing ones. No incidents of them being eaten, that I know of. This offers a number of interesting elements to work with, colour, the different tip shapes on the crayons from use, as well as the paper wrapping around each crayon. Interesting to see how that could be recreated in Rhino. 


That's all for today, been a slice! Hope you had a nice Thanksgiving with all the trimmings. 


Monday, October 5, 2020

Surface Design Part 2

Happy Monday. 

I've been feeling rather lost and behind in this class with my brain and its inability to accept technology as a way of life. So, armed with a bag of jalapeno cheddar Doritos I waged war on Rhino. Bag of Doritos, and 6 hours later, I'm feeling much more comfortable with the commands, layers, hatch and building of shapes. 
PATTERN I

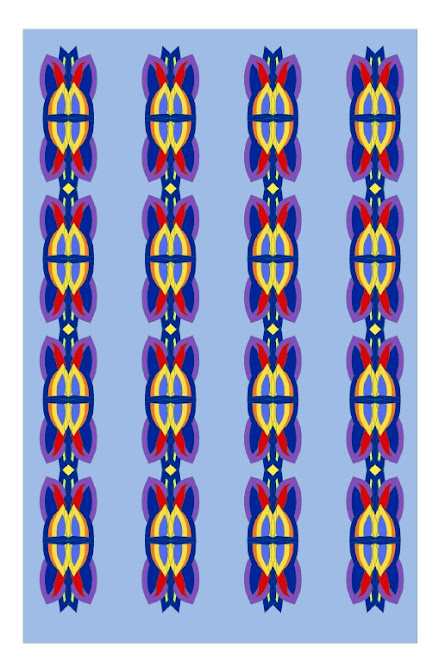
I used the sewer grate again as a starting point, just as I had last week. It took many failed attempts at hatching and ensuring I wasn't layering shapes on shapes but rather within them... not as tricky as I originally thought. In our group last week we discussed there was potential with this pattern and it would be fun to see what colour would do with it. 


So, I made the shape of the grate, and then 'array' became my new best friend (now that I finally figured it out), then came hatching and layering, there is no shortage of possibilities with the colour scheme with the layout of hatching :)  

Once I got the hang of it, I found this to be a lot of fun, and recognized the pre-planning involved when I started to mirror the design into the full picture. I played a lot with colour in the begining and started to simplify as I got closer to the final as shown in my screen shot of layers. 


PROCESS


Mid bag of Doritos here is where I landed...

FINAL 1

FINAL 2 

...end of Doritos :( 


PATTERN II


I also wanted to explore 'Interpcrv' some more and try organic shapes (I was nervous about this). I created the shapes of the image while using 'picture' and then broke it down with 'hatch'. Again I utilized 'mirror' and 'array' until I had the layout I liked, then I began playing with colours. 


 FINAL'S


Hope you enjoyed 'hatch' as much as I did! Until next time, keep fit, and eat Doritos. 

Structure Collab Final Week

And we've made it. Half dead, and really sleepless. I am glad to see that this project has come together, although I am not sure we are ...